Wrist Pain and Yoga
The wrists are a very common source of pain for yoga practitioners. This is especially true for the beginner. To understand how to alleviate discomfort, it all comes down to biomechanics: the combined structure of the wrist and the force loads that are applied with activity.
The wrists are not typically used to or necessarily structurally designed for repetitive, heavy body-weight load. It is imperative to educate yoga students on how to minimize load-bearing in the wrist. Additionally, teachers and coaches should understand the common underlying causes of wrist pain and injury.
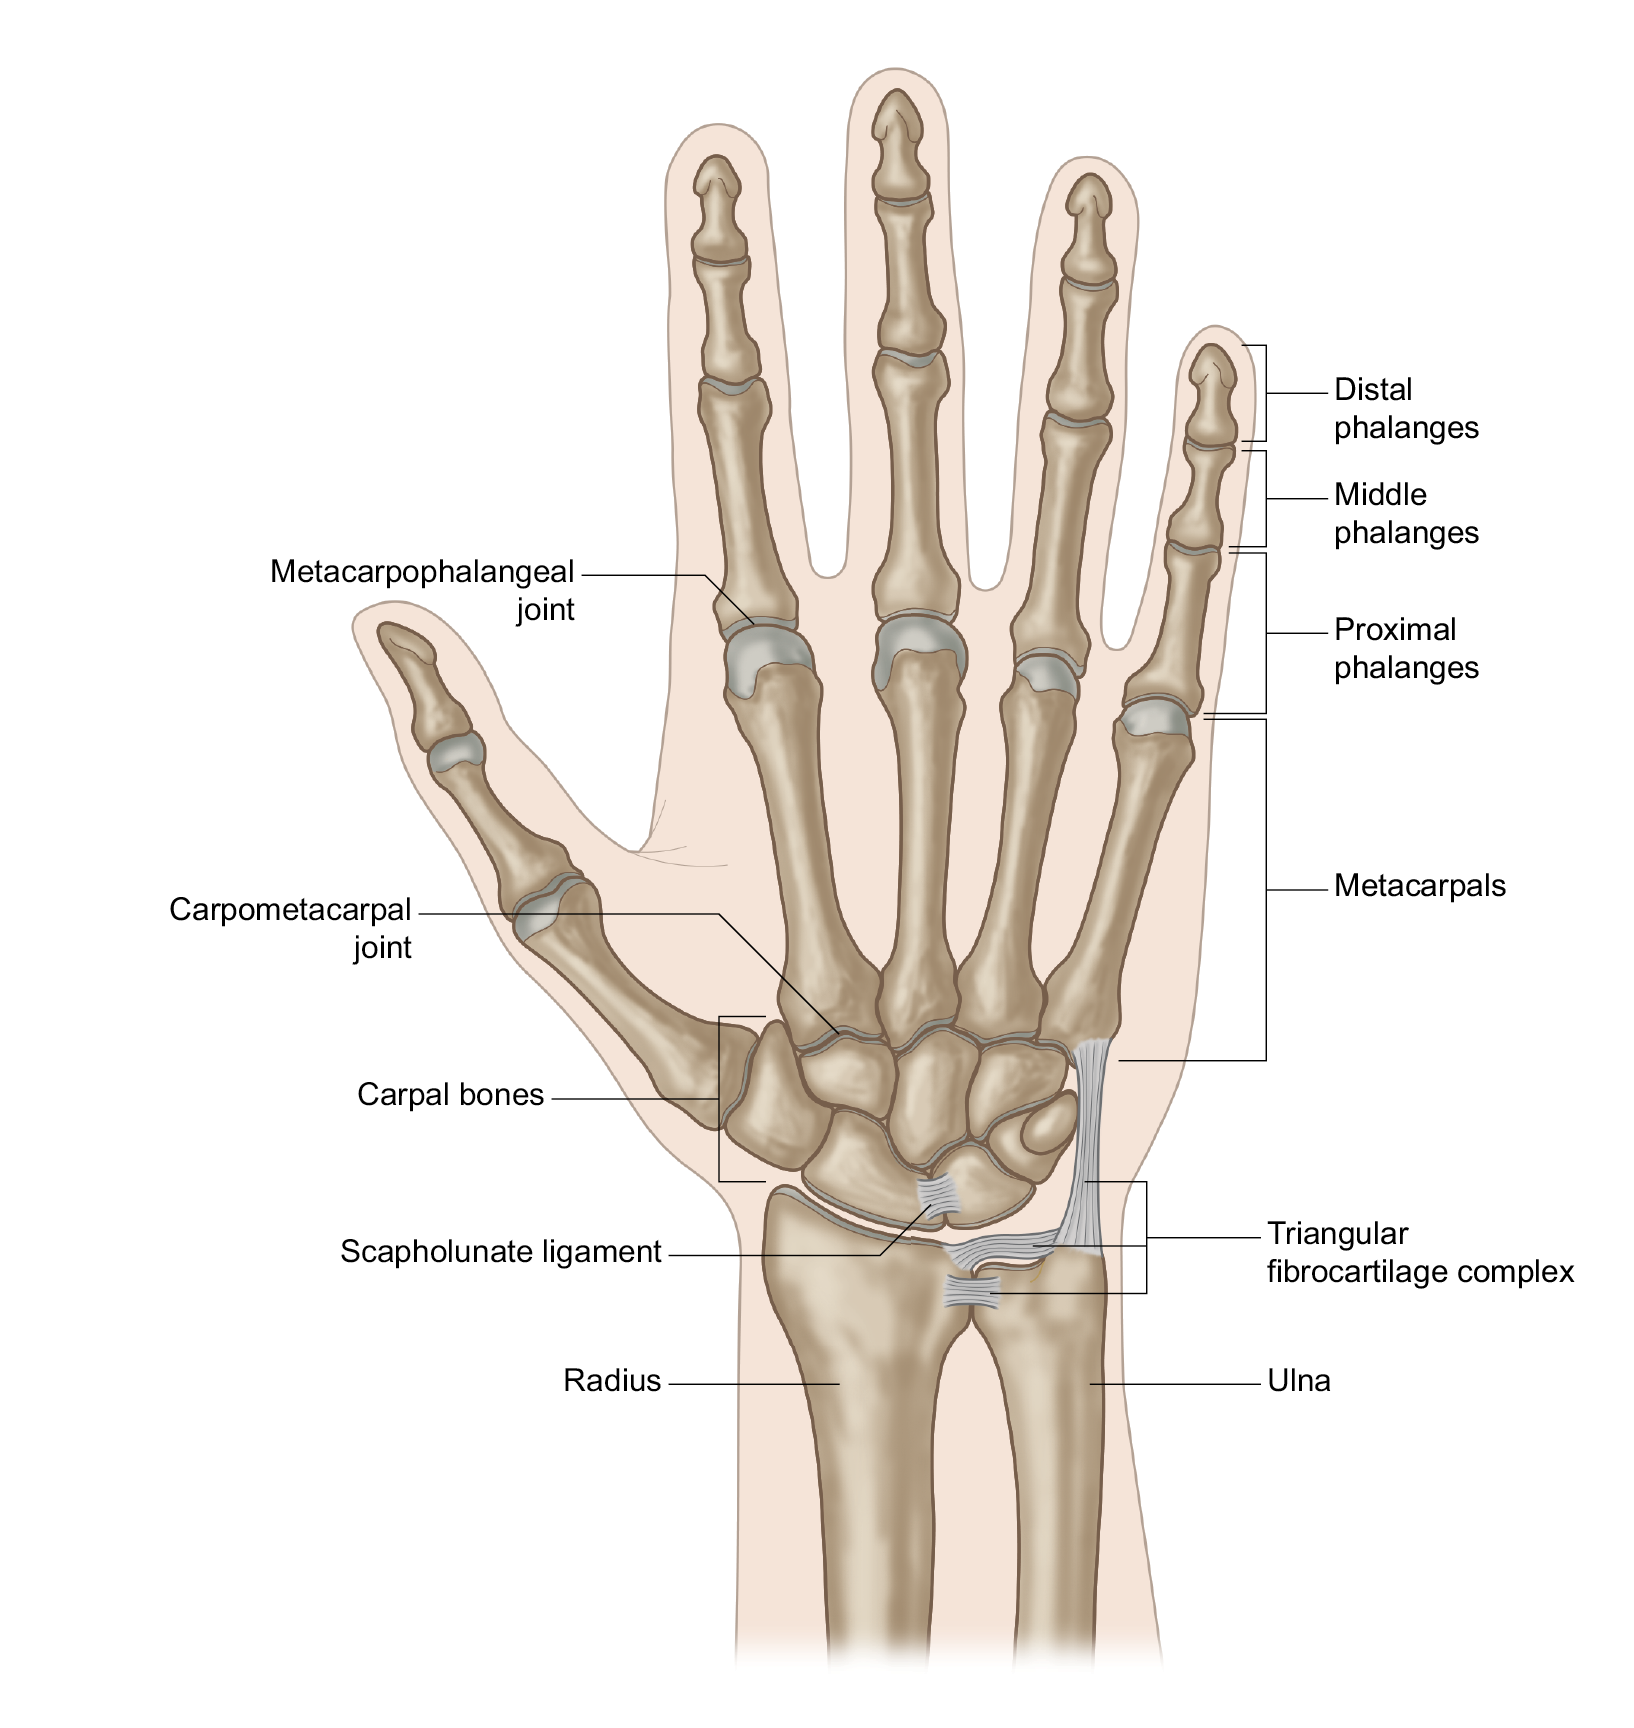
Four of the most common injuries: carpal tunnel syndrome, dorsal wrist impingement, scapholunate ligament injuries, and triangular fibrocartilage injuries are all correlated with over-loading and wrist extension (dorsiflexion). For all three conditions noted, the underlying cause is repetitive over-loading and or acute trauma.

The wrist is a small space with a lot going on! So many articulations are possible between the radius, ulna, and carpal bones. Add in ligaments, muscles, tendons, arteries, veins, and nerves, and you’ve got a crowded space with no room for inflammation. When tissues get bothered or inflamed, you feel it pretty quickly. The median nerve is the source of carpal tunnel syndrome, which is another result of repetitive overuse. This article will not go into specifics about any of the mentioned injuries, but I hope that the pictures here will help spark your curiosity and further investigation.
general principles to apply to your yoga practice to minimize the force load in the wrist joint.
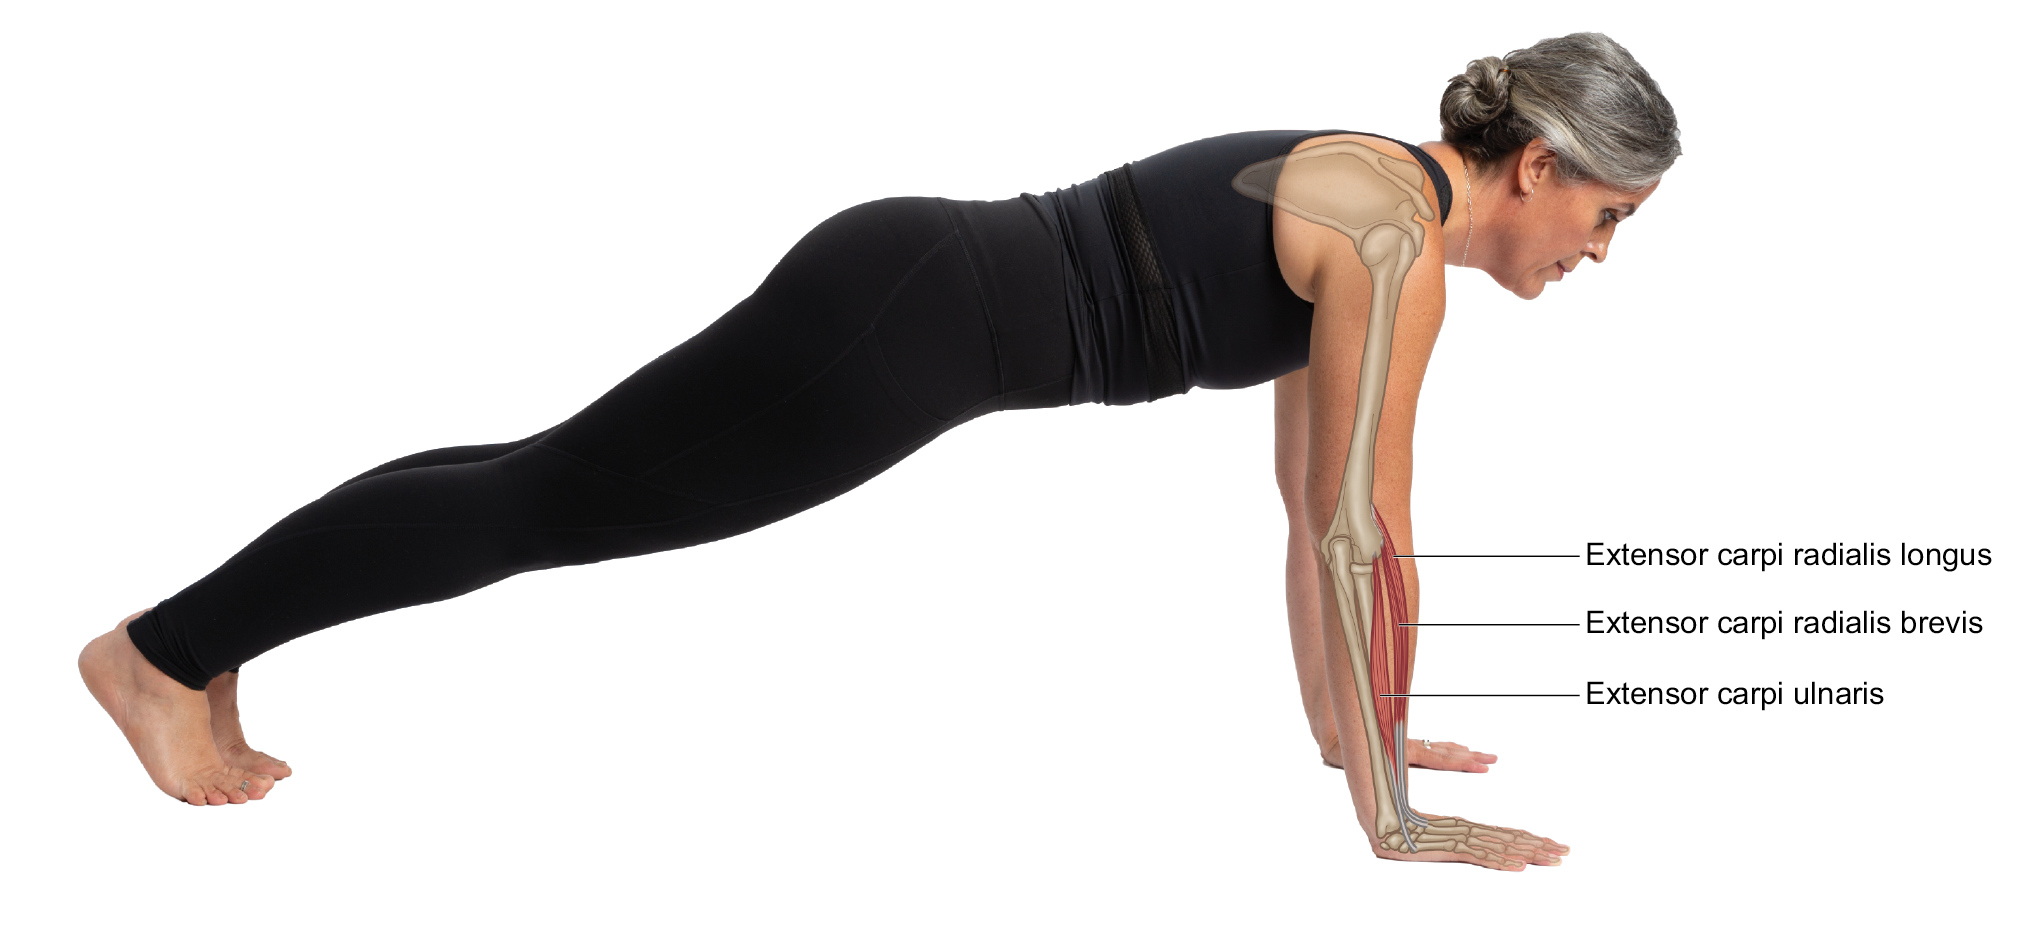
Avoid hyper-extension with weight-bearing. This applies to poses like plank, low plank, side-plank, upward-facing dog, crow, handstand, all arm-balances, and wheel. Aim to not take the wrist beyond a 90-degree bend. With the shift from high plank to low plank, I see this happening when students have learned to take their weight forward from their feet in efforts to get elbows over wrists. This action is often overdone, and the result is repetitive wrist-joint overloading. Experiment with having a keen awareness of your wrist creases in any weight-bearing postures. What shifts are required to keep them open and spacious? In downward-facing dog pose, take advantage of the alignment to wire-in the somatic experience of open, spacious wrists. Then see if you can bring a little down-dog wrist sensation into the other hand weight-bearing postures.
Use your hands to create a stable base. This is a pretty straight-forward concept, but without awareness, it’s incredible how quickly the hands can get lazy. Spread your fingers wide and press fingertips into the floor. imagine the fingertips taking some of the weight out of the wrists.
Use the rest of your body to redistribute the forces away from the wrists. Your body is an amazing system of pulleys, levers, and muscle potentiality. Learn to use it to your advantage. Downward-facing dog pose is a great place to practice this, then you can learn to transfer the actions to all other postures. Imagine a diagonal line from your wrist creases up through your tailbone. Ignite this line of action; pull diagonally up and away. This will require active legs, active core, and a slight bend in your knees for hip mobility. Use your muscles to oppose gravity, to lessen the load in the wrists. The same thing goes for all poses mentioned in number one.
When these actions don’t help alleviate wrist discomfort, it’s time to give the wrists a break. If it is a matter of working through a current injury, it will persist until you change something. If it is a situation of needing to build strength, do so, little by little. You can always take your knees or forearms to the floor or find a modification that naturally lessens the amount of force landing in the wrists. And there is plenty of yoga to be had without these wrist weight-bearing postures.
I don’t suggest the often-used modification of weight-bearing in the wrists. This tends to lead to further kinematic dysfunctions. There are all sorts of contraptions (wedges, jellies, etc.) to put under the base of your hand for opening the wrist angles up (lessening the extension). These can be a great alternative for slowly building strength and rehabbing an injury.

I will follow up later with some beneficial wrist stretches and exercises. But if you have wrist pain from yoga, I am confident that the tips given above can help you! Please let me know if you have any questions. As always, I am happy to help.
Stacy Dockins
Yoga & Orthopedic Rehabilitation
Stacy owns Yoga Project Studios with her husband Dave. She is the author of Embodied Posture: Your Unique Body and Yoga, which is a complete yoga anatomy text designed with bio-individuality and the healing aspects of embodiment in mind. She is a nutritional therapy practitioner, corrective exercise specialist, and studies orthopedic rehabilitation at A.T. Still University. She and Dave lead programs and trainings for teachers and students of yoga across the globe.
Are you on Instagram? Follow me for fun and informative yoga tips!
***All illustrations are from Stacy’s Embodied Posture book.
Join Stacy for her 3-day program: Functionality for Sustainability in Yoga
2/21-23 in Petaluma ,California
4/17-19 in Baton Rouge, Louisiana